The Ultimate Guide to Contour for Oval Face Shapes
Discover expert techniques and tips for contouring oval face shapes. Achieve a flawless look with our comprehensive contouring guide.
Contouring has become a staple in makeup routines, capable of enhancing facial features and creating a sculpted, camera-ready look. For those with an oval face shape, understanding the specific techniques and tips for contouring can make all the difference. In this guide, we delve into everything you need to know about contour for oval face shapes, offering expert advice to help you master this essential makeup skill.
Understanding Your Oval Face Shape
Oval face shapes are often considered the ideal facial structure due to their balanced proportions. Characterized by slightly wider cheekbones and a gently narrowing jawline, the oval face tapers elegantly towards the chin. If you have an oval face, your primary goal with contouring is to enhance your natural symmetry and emphasize your well-balanced features.
Identifying an Oval Face Shape
Before diving into contour techniques, it's crucial to confirm that you have an oval face. Stand in front of a mirror and trace the outline of your face with a dry erase marker. An oval face will show these features:
- Forehead slightly wider than the chin
- Cheekbones are the widest part of the face
- Face length is about 1.5 times the width
- Smooth and rounded jawline
Essential Contour Products and Tools
Investing in the right products and tools is key to achieving a flawless contour. Here are some essentials for contouring an oval face shape:
Contour Products
- Contour Powder or Cream: Choose a shade slightly darker than your natural skin tone.
- Highlighter: Use a product that adds a subtle glow to the high points of your face.
- Blush: Opt for a soft, natural-looking color that complements your skin tone.
Tools and Brushes
- Contour Brush: A slanted or angled brush works best for precision contouring.
- Blending Sponge: For seamless blending and a natural finish.
- Fan Brush: Ideal for applying highlighter.
- Setting Powder: Helps to lock in your makeup and reduce shine.
Step-by-Step Contouring for Oval Face Shapes
Follow this step-by-step guide to contour your oval face shape, enhancing your natural symmetry:
Step 1: Preparation
Start with a clean, moisturized face. Apply a primer suitable for your skin type to create a smooth base for your makeup.
Step 2: Foundation and Concealer
Apply foundation and concealer to even out your skin tone. Use a foundation brush or sponge to blend evenly.
Step 3: Contouring
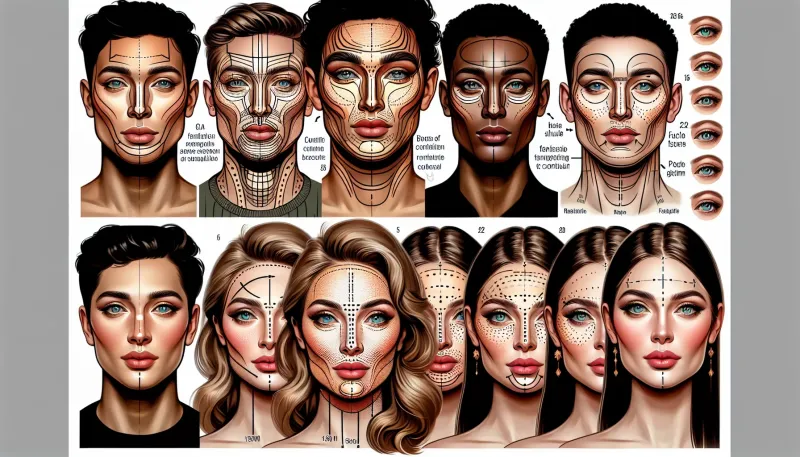
Using your contour powder or cream, gently apply the product to the following areas:
- Hairline: Contour along your hairline to add dimension to your forehead.
- Cheekbones: Begin at the top of your ear and move diagonally towards the corner of your mouth. Blend well to avoid harsh lines.
- Jawline: Define your jawline by adding contour from the ear to the center of your chin. Blend downward to ensure a seamless look.
- Nose (Optional): If you wish to contour your nose, draw two lines down the sides and blend well.
Step 4: Highlighting
Highlight the high points of your face for a radiant, lifted look:
- Forehead: Apply highlighter to the center of your forehead.
- Cheekbones: Dab highlighter on the tops of your cheekbones.
- Nose: Lightly highlight the bridge of your nose.
- Cupid's Bow: Add a touch of highlighter to your cupid's bow to enhance your lips.
Step 5: Blush
Apply blush to the apples of your cheeks, blending towards your temples for a natural flush.
Step 6: Blending
Blend all contour, highlight, and blush areas well to ensure there are no harsh lines. Use a blending sponge or clean brush for this step.
Step 7: Setting
Set your makeup with a translucent setting powder to keep it in place throughout the day. A setting spray can also be used for added longevity.
Additional Tips for Oval Face Contouring
To elevate your contouring game, consider these additional tips:
Choose the Right Shade
Select contour shades that complement your skin tone. Cool-toned contours work well for fair skin, while warm-toned shades suit darker skin tones.
Blend, Blend, Blend
Blending is crucial for a natural finish. Use a light hand and blend thoroughly to avoid harsh lines and create a seamless look.
Experiment with Different Textures
Mix and match powder and cream products to find the texture that works best for your skin type and desired finish.
Practice Makes Perfect
Contouring is an art that requires practice. Experiment with different techniques and products to find what works best for your unique facial features.
Common Contouring Mistakes to Avoid
Avoid these common mistakes to ensure your contour looks flawless:
Using Too Much Product
Less is more when it comes to contouring. Start with a small amount of product and build it up as needed.
Skipping Blend
Unblended contour can look unnatural and harsh. Take the time to blend thoroughly for a seamless finish.
Ignoring Face Shape
Use contouring techniques tailored to your face shape. Applying a one-size-fits-all approach can result in a less flattering contour.
Conclusion
Mastering the art of contour for oval face shapes can elevate your makeup skills and enhance your natural beauty. By understanding your face shape, using the right products, and following a step-by-step approach, you can achieve a flawless, sculpted look that highlights your best features. Practice, experiment, and most importantly, enjoy the creative process of contouring.


